Common Wisdom Teeth Problems

March 23rd, 2022

Have you ever wondered why people have wisdom teeth? These are a third set of molars that come in behind the rest of all your other teeth, usually during early adulthood. Scientists and anthropologists believe that wisdom teeth are a result of evolution, because our ancestors needed these extra teeth to handle their primitive diets. Nowadays, the average diet consists of fewer hard-to-chew foods, which renders wisdom teeth largely superfluous.

Most people begin to experience wisdom teeth pain between the ages of 17 and 25. Our ancestors nicknamed them wisdom teeth because they appeared at a time in life when we supposedly grew wiser.

If you’ve already had your wisdom teeth removed, you know how painful they can become if they aren’t taken care of promptly. If not, watch out for discomfort in the back of your mouth and let Drs. Sidney and Jacob Kelly know right away if you think your wisdom teeth are coming in.

In some cases, people do not experience any problems or discomfort with their wisdom teeth. These patients may keep their wisdom teeth intact if there’s enough room in their jaw to fit them properly. But this is generally not the case, so wisdom teeth can cause several concerns, depending on which direction they grow.

Common problems include:

  • Damage to surrounding teeth due to the pressure from the emerging teeth
  • Infection that causes the surrounding gums to swell and become painful
  • Tooth decay due to the lack of room to clean the teeth properly
  • Impaction (when the tooth is unable to break through the skin)
  • A cyst that may damage the jaw, the surrounding teeth, and nerves

If you haven’t had your wisdom teeth removed yet, there are many symptoms to watch out for when they begin to grow. Symptoms may include:

  • Pain or stiffness in the jaw
  • Tooth irritation
  • Swelling of gum tissue
  • Crowding of other teeth
  • Spread of tooth decay or gum disease on nearby teeth

If you’ve noticed these symptoms, schedule an appointment at our Roseville, CA office. Don’t forget: This is a common procedure that will take some time to recover from. Allow your mouth to heal, and then you’ll be able to get back to a normal routine quickly and be free from pain!

Socket Preservation

March 16th, 2022

Dental implants are a marvel! They look just like your natural teeth, and, even better, they function just like your natural teeth. So, when you’re planning on a dental implant after an extraction, you want to make sure that your implant has the best chance of success—and we do, too. That’s why we might recommend a socket preservation procedure, where socket grafting takes place immediately after your extraction.

What is a socket graft, and what does it “preserve”? Let’s take a closer look.

Socket Preservation—A Logical Choice After Extraction

You’ve decided on a dental implant for some excellent reasons.

  • A missing tooth can change the appearance of your smile.
  • Your remaining teeth might shift to fill the empty space, causing alignment and bite problems.
  • A lost tooth affects the amount, shape, and health of the bone surrounding your teeth.

No one wants to lose a tooth, but sometimes, due to injury or decay, an extraction is the only choice for your oral health. After your tooth is extracted, if the socket bone holding the tooth is perfectly healthy and the extraction is a simple one, we might be able to place an implant post in the socket right away.

But often, bone needs time to heal before placing an implant post, and you risk losing the bone size and density you need to make a future implant possible. How can you lose bone? That’s an unfortunate consequence of losing teeth. Teeth are important not just because they let us eat comfortably—they also help maintain bone health.

Without the stimulation of biting and chewing, the bone beneath the teeth begins a process called resorption. As older cells are absorbed back into the body, new bone cells aren’t produced as quickly to replace them. The alveolar bone, the thick ridge of the jaw which holds our sockets, shrinks in size. As the bone gets smaller, gum tissue shrinks around it, causing a sunken spot where your tooth used to be.

For a dental implant to anchor successfully in the jawbone, you need healthy bone that is high enough, wide enough, and dense enough to hold the implant post securely as it fuses with the bone.

A socket graft at the time of extraction provides two important benefits: grafting material fills the empty socket immediately, preserving the bone and gum area around it, and the graft material acts as scaffolding for new bone growth, creating a firm, dense foundation for your implant.

Grafting materials are gradually and safely absorbed as your new, healthy bone tissue replaces them. The result, after several months of healing, is an alveolar ridge with normal height and width and with the density needed to anchor an implant successfully.

The Grafting Procedure

Grafting material comes in different forms, including allografts (made from donor bone), synthetic grafts (made from synthetic materials which function like bone tissue), and autografts (bone taken from your own body). Growth factors may also be included in the grafting material to encourage new cell growth. Drs. Sidney and Jacob Kelly will recommend the type of graft which will work best for you.

A socket preservation procedure will frequently involve the following steps:

  • Local anesthesia to numb the area before your extraction. You might choose sedation options as well, which we’re happy to discuss with you in advance.
  • Careful cleaning of the site after the tooth is extracted.
  • Filling the empty socket with bone grafting material.
  • Placing a barrier or membrane over the graft to protect it as it heals.
  • Suturing the surrounding gum tissue.

Aftercare Treatment

Aftercare treatment for a socket graft is a lot like the treatment for a tooth extraction. You’ll need to be careful around the graft area for several days as it heals, and we’ll give you specific instructions for your recovery. Normally, these may include:

  • Don’t disturb or touch the area. Even pulling on lips or mouth to look at the site can put stress on your sutures.
  • Immediately after the procedure, we can give you suggestions for reducing swelling and managing any pain you might be feeling.
  • We’ll let you know when and how to rinse your mouth clean and when you can return to brushing. And no spitting!
  • Eat carefully. We might recommend a liquid diet for a few days before transitioning to bland and cool soft foods. We’ll let you know the best diet for the period after your surgery. Don’t use a straw for your liquid diet, because suction can interfere with the wound.
  • Treat yourself carefully for a few days by avoiding strenuous activities, including workouts.
  • Don’t smoke. Smoking interferes with the healing process, and the suction involved does your graft no favors either.
  • Visit our Roseville, CA office for follow up appointments as recommended. We’ll monitor your healing, and give you a timeline for your future implant.

Preserving your socket now instead of repairing it later has many advantages. Immediate placement of a graft protects bone size and density, eliminates the need for a potential bone grafting procedure in the future, and makes it possible for you to enjoy the natural look and feel of a dental implant as soon as possible. If you have an extraction scheduled, let’s discuss why socket preservation might be your best path to an efficient, timely, and successful dental implant.

Flossing Fixes

March 9th, 2022

A length of floss plus your teeth is about as low-tech as it gets. But, as with so many other “simple” skills, it helps to learn just the right technique to avoid common mistakes and to make your flossing as effective as it can possibly be.

  • Choose the Right Floss for You

You’re getting ready to go out, and your floss keeps getting stuck, shredding, or snagging. You might try waxed flosses or flosses treated to glide easily through the teeth if this is a difficulty. (But do call us if it happens a lot—it could be a problem with a restoration, or a cavity, or some other condition we should address.) If you have the opposite problem, too wide a space between teeth for effective flossing, there are dental tape flosses that work with wider spacings. Braces? There are even specially designed dental flosses that thread between brackets and wires to access hard-to-reach plaque and food particles. If you’re unsure which product will work best for you, we have recommendations.

  • Don’t Be Too Hard on Yourself

Did you know dental floss is a handy kitchen tool? You can use (unflavored) floss to cut cakes into even layers, slice cheese, or divide a log of cookie dough into perfect rounds. Just pull the floss taut and saw away. But let’s not use this technique on delicate gum tissue! Gums can be injured by a vigorous, sawing motion. Instead, gently guide the floss between the teeth to the gums, and, when you reach the gum line, gently ease the floss up and down the tooth surface. But do remember, sometimes the gums are sore and sensitive because of too little flossing, not too much. Proper cleaning will help keep your gums both healthy and pain-free.

  • Technique Counts!

We often use floss to remove food particles from between the teeth, which provides instant dental gratification. But you are flossing for the long term as well. Proper flossing removes the plaque that leads to cavities from places your brush just can’t reach. Make sure you floss between each tooth, and don’t forget the back of those teeth on the end. The next time you visit our Roseville, CA office for a cleaning, let us demonstrate the most effective techniques for gently removing plaque from beneath the gum area and on the tooth’s surface.

  • It’s All in the Timing

How much time should you spend flossing? That answer will depend on your individual needs. For some people, thorough and careful flossing once a day will be sufficient. For others, flossing more often might be advisable. We can help you decide how often and how long to floss.

It might take some time and practice to learn to floss effectively, but you will find your technique gets better and your flossing is accomplished more quickly once you have the basics down. If Drs. Sidney and Jacob Kelly can offer any suggestions, don’t hesitate to ask!

Seven Ways to Repurpose Old Toothbrushes

March 2nd, 2022

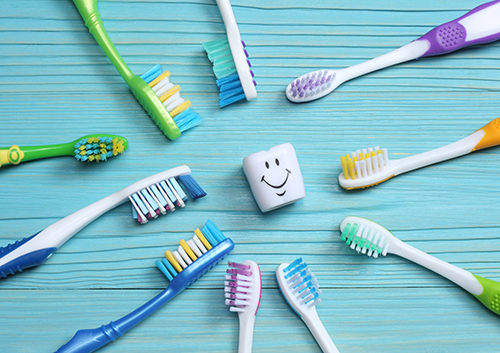
It’s done a wonderful job for you, but after three or four months, the time has come to retire your toothbrush. Bristles that once easily removed food particles and plaque have become frayed and just aren’t as effective. But now that you’re regularly changing out your toothbrush, what to do with those retired brushes besides add to the local landfill? Check out some recommendations from Drs. Sidney and Jacob Kelly for some second career options for that old toothbrush.

Make Your Jewelry Shine

A gentle brush with your favorite jewelry cleaner and your old brush will remove dirt from small spaces and filigree that a cloth just can’t reach. Do check that brushing is safe for your jewelry—pearls, for example, are not a good candidate.

Keep Your Woodwork Dust-free

Keep the details on your wood trim dust free with an old toothbrush. Baseboards are some of the hardest places to keep clean—even vacuums have difficulty getting dust and dirt out of trim. But an old toothbrush is perfect for cleaning the top, the grooves, and the inside corners of your baseboards. You can also remove dust from around door trim and inside window tracks.

Polish Sinks and Faucets

Use a repurposed toothbrush to remove build-up where the base of your faucet meets the sink, or around levers and handles. And don’t forget the metal ring around the drain!

Clean Kitchen Gadgets

Those miniature blades in your coffee maker or blender, the tiny holes in your cheese grater, the micro-openings in your microplane—small cleaning jobs need small tools! Try an old brush the next time you have a mini-cleaning problem.

De-grease Appliances

And while we’re in the kitchen, don’t forget your appliances. A toothbrush can clean grease around dials, handles, and knobs where a sponge can’t reach.

Refresh Your Grout

There are special brushes made just for scrubbing grout, but give your old brush a try first. Use your regular cleaning solution or paste for fresh, clean grout lines on your tile floors and counters. 

Keep Your Technology Sleek

Your keyboard has a busy life and it shows! Keep the spaces between your keys dust and crumb free with a clean, dry toothbrush. The next time you’re detailing your car’s interior, try a toothbrush for cleaning around buttons and dials on your dash. And don’t forget your remote controls, or any other place where keys, knobs, and buttons collect dust.

There’s still a lot of life left in that toothbrush! If you choose to reuse, do be sure to thoroughly clean your toothbrush before it transitions to another housekeeping detail. It’s worth the effort—your old brush will prove useful in any number of new ways, and your home—and the environment—will thank you!

Contact Us!
call email